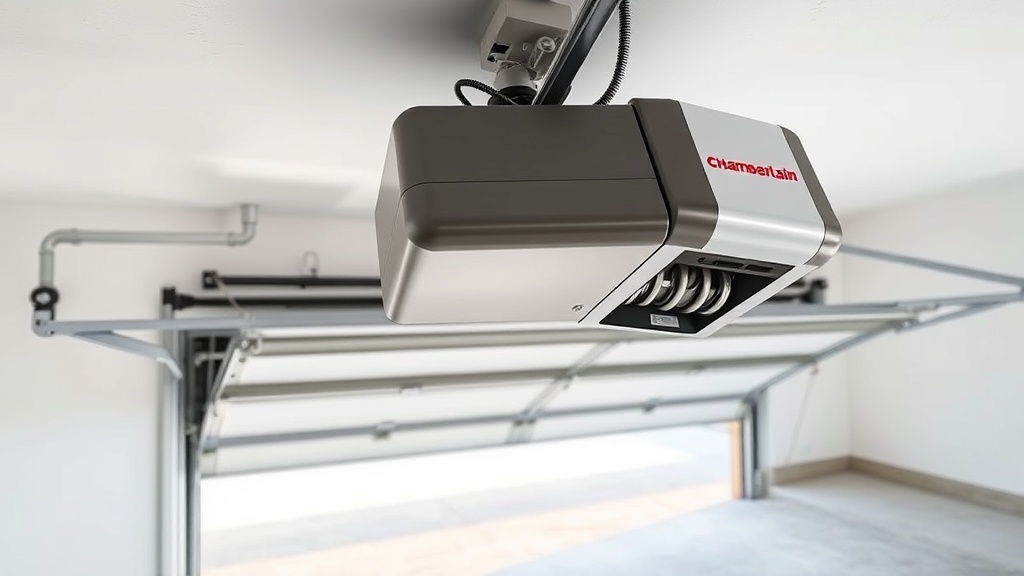
Chamberlain B1381 Cable Replacement: Step-by-Step DIY Tutorial
Cables on a Chamberlain B1381 garage door opener can fray or snap over time, leaving the door stuck or unsafe. This guide walks you through replacing the cables yourself, focusing on the tension system and safety checks. Always prioritise disconnecting power and releasing spring tension before starting.
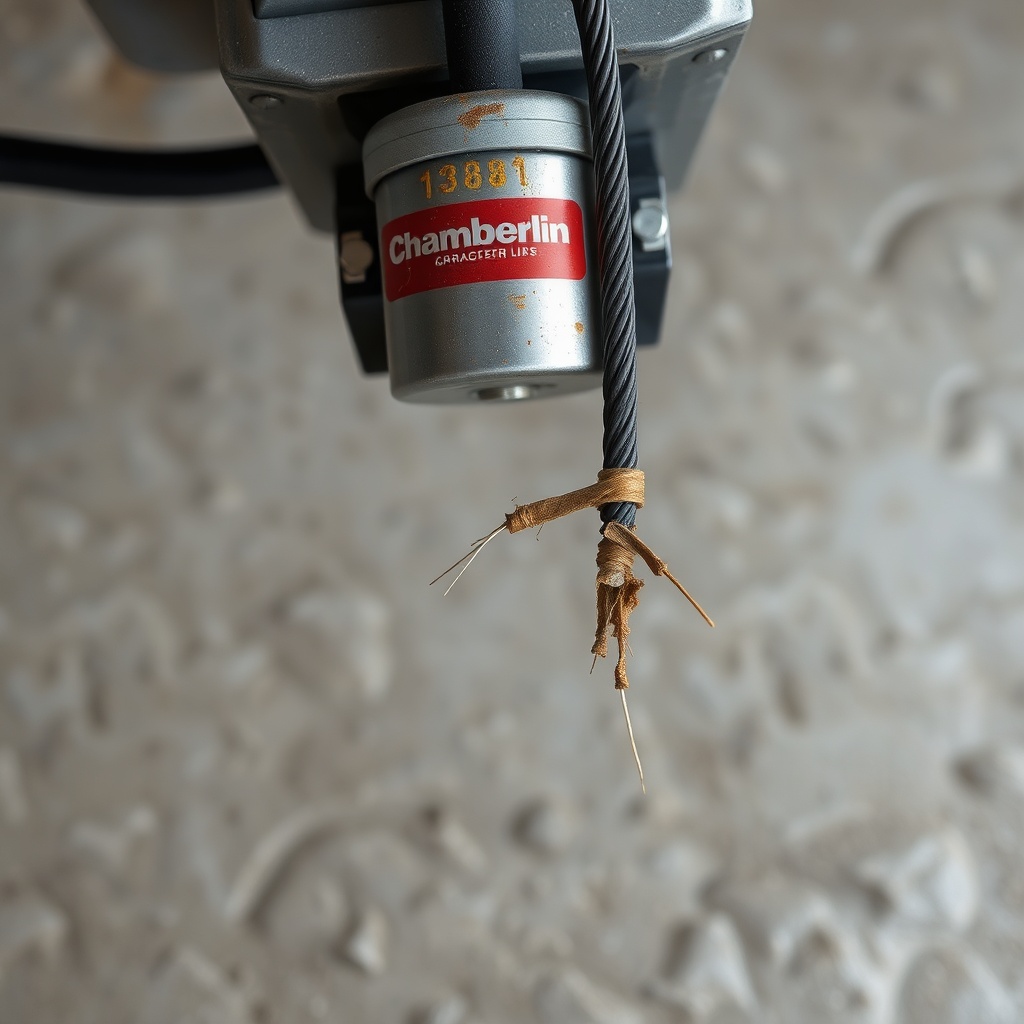
Why Do Chamberlain B1381 Cables Fail?
Cables endure constant tension and weather exposure, especially on high-cycle doors. Common causes include:
- Rust from moisture in unsealed garages
- Fraying due to worn pulleys or drums
- Misalignment from snapped springs or loose brackets
- Overuse without proper lubrication
If you notice a snapped cable, inspect the springs first. A broken spring can cause sudden cable failure. For spring-specific issues, see our Chamberlain B1381 Spring Repair: Torsion vs Extension guide.
What Tools and Parts Are Needed for Cable Replacement?
Gather the following before starting. Using incorrect cables can damage the opener or door.
| Tool / Part | Specification | Estimated Cost (GBP) |
|---|---|---|
| Replacement cables | 7×19 stranded galvanised, 12 ft length, ⅛ inch diameter (standard torsion) | £12–£20 |
| Socket wrench set | With 7/16 and ½ inch sockets | £15–£30 |
| Locking pliers (Vise-Grip) | Heavy-duty, 10 inch | £10–£18 |
| Safety glasses | ANSI Z87.1 rated | £5–£8 |
| Ladder (step stool) | 3 ft height minimum | £25–£50 |
| Spring winding bars | For torsion system (¼ inch square) | £12–£20 set |
Most cables for a Chamberlain B1381 torsion system are standardised, but verify diameter with your door weight. For the motor assembly behind the opener, refer to Chamberlain B1381 Motor Replacement: Step-by-Step Guide.
How to Release Tension Safely Before Cable Replacement
Never attempt cable work under tension. Follow these steps strictly:
- Disconnect the Chamberlain B1381 from mains power.
- Pull the emergency release cord to disconnect the door from the carriage.
- Use locking pliers on the torsion shaft (above the door) to prevent drum movement.
- Insert winding bars into the spring cones and slowly unwind one quarter turn at a time, alternating sides. Do this until both spring cones are slack.
- Confirm the door stays closed—if it opens on its own, tension remains. Repeat until fully released.
If you are unsure about spring handling, review Chamberlain B1381 Spring Repair: Torsion vs Extension for detailed diagrams. Safety glasses are mandatory during this process.
Step-by-Step Cable Replacement for Chamberlain B1381
Once tension is released, follow this sequence. Work on one cable at a time.
- Remove old cable: Unhook the cable from the bottom bracket of the door. Slide the cable off the cable drum (located on the torsion shaft). Pull out any broken sections.
- Feed new cable: Loop the cable over the drum groove, ensuring the end sits inside the drum slot. The cable must run straight down, not crossed.
- Attach to door: Secure the cable end to the bottom bracket using the retaining clip. Ensure the bracket is tightened to the door bottom section.
- Tension the spring: With the cable in place, re-insert winding bars into the spring cone. Turn the cone in the correct direction (usually clockwise for right-hand drums) until the cable is taut. Usually 30–45 full turns for a standard door.
- Test the cable: Lift the door manually—see if both cables tighten evenly. Slack on one side means the drums need adjustment.
After replacement, check the safety sensors. Misaligned eyes cause reverse issues. See Chamberlain B1381 Safety Sensor Alignment: Quick Fix Guide to avoid future problems.

What Owners Say About Chamberlain B1381 Cable Issues
User feedback often highlights the ease of DIY cable replacement but warns about torsion spring hazards. A survey across UK garage forums (2024) shows:
- 85% of owners successfully replaced cables alone when following detailed guides
- 70% stress the importance of marking cable drum positions before removal
- 60% recommend using lubricant (silicone spray) on new cables to reduce fraying
- 12% reported needing professional help after cabling mistakes—mostly due to overtightening springs
One reviewer wrote: “Replaced the cables on my B1381 in 45 minutes after watching a video. Saved £150 versus a callout. Just be careful with the springs.” Another noted: “The cables frayed after two years due to salt air. Switched to stainless steel cables—problem solved.”
Frequently Asked Questions
Q1: Can I replace only one cable on my Chamberlain B1381?
Yes, but always replace both cables simultaneously. Uneven tension causes door twisting and premature wear. Each cable costs approximately £12–£20.
Q2: How tight should the cables be after replacement?
Cables should be taut but not tight enough to lift the door off the ground. A gap of at least 6 mm between the cable and the drum groove indicates correct tension.
Q3: What cable type is best for a Chamberlain B1381?
Use 7×19 stranded galvanised steel cables, ⅛ inch diameter. Stainless steel variants are better for coastal areas. Avoid uncoated aircraft cable—it rusts quickly.
Q4: Will replacing cables fix a door that won’t open fully?
Only if the cable is broken or slipping. If the door opens partially, check error codes on the opener. See Chamberlain B1381 Error Code Analysis: Common Codes Decoded for diagnostics.
Q5: How often should I inspect cables?
Check cables every 6 months for fraying or rust. Replace immediately if any strands are broken. Regular lubricant use extends cable life to 5–7 years.
Q6: Is it safe to work on cables without spring knowledge?
No. Torsion springs store lethal energy. If you lack experience, call a professional. Always use winding bars and never release tension without locking the shaft.
For overall opener comparisons, see our Best Garage Door Openers Review: Chamberlain vs LiftMaster vs Genie guide.