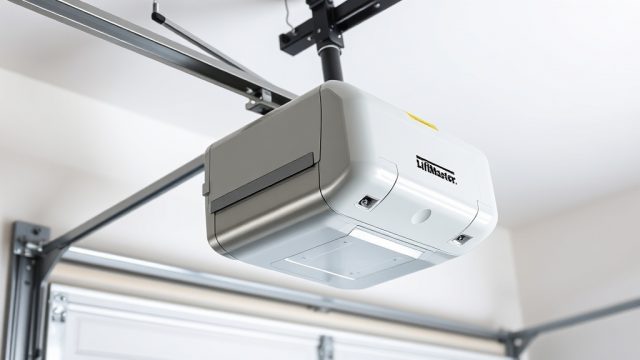
Why Choose the LiftMaster 8500 for Your Garage?
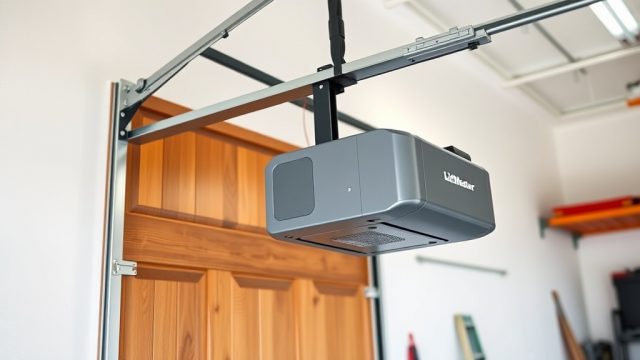
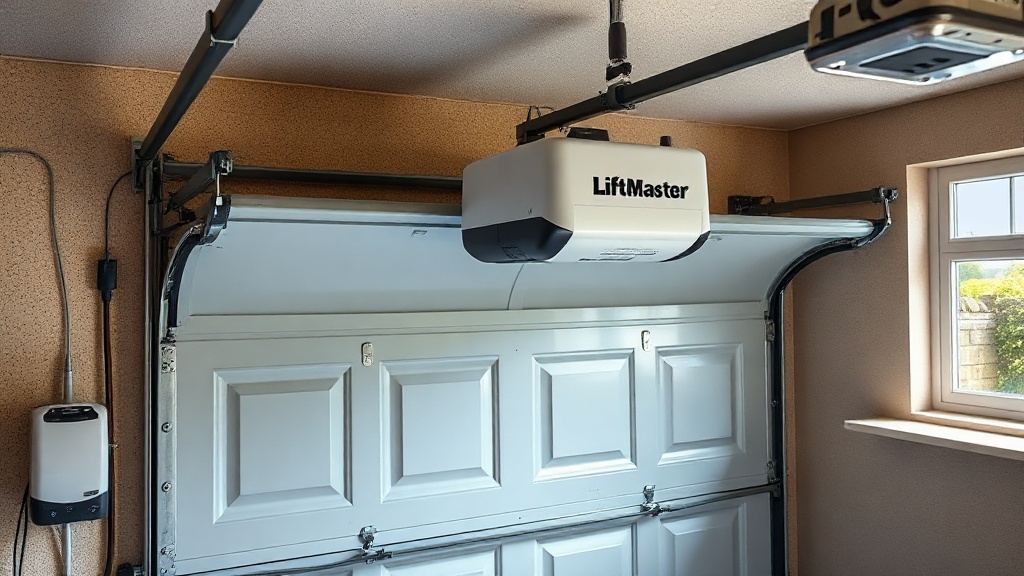
The LiftMaster 8500 is a premium wall-mount garage door opener designed to maximise ceiling space and deliver quiet, reliable operation. Unlike traditional trolley systems, this model mounts to the wall beside the door, freeing up overhead room for storage, a loft, or a higher lift. For UK homeowners looking to modernise a tight garage, the 8500 offers a battery backup that keeps the door working during power cuts—a practical feature in areas with frequent outages. This guide walks through installing the battery backup, a crucial step for ensuring your garage remains accessible even when the grid fails.
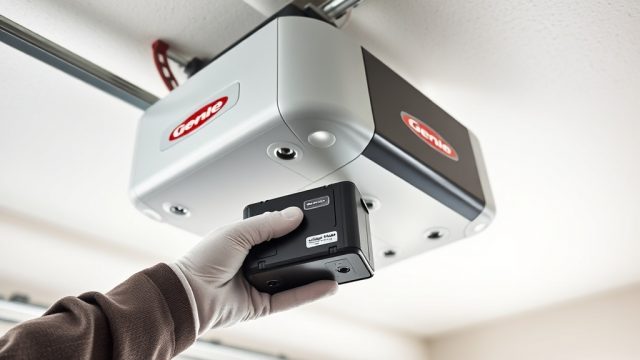
What Comes in the LiftMaster 8500 Battery Backup Kit?
Before starting, confirm you have all components. The standard 8500 ship with an integrated battery backup, but aftermarket or replacement kits (model 475LM) are available. A typical kit includes:
- Battery backup unit (sealed lead-acid, 12V DC)
- Mounting bracket and hardware
- Cable harness with connectors
- Instruction manual
Prices at UK retailers hover around £180–£220 for the opener with built-in backup, or £70–£90 for the standalone 475LM kit. Verify compatibility with your 8500 serial number; most units from 2015 onward support it. If you’re tackling the LiftMaster 8500 Wall-Mount Installation: Space-Saving Tips and Tricks, this battery backup step fits neatly into that process.
How to Install the Battery Backup on a LiftMaster 8500
Installation is straightforward but requires care with wiring. Follow these steps:
Step 1: Disconnect Power and Prepare the Area
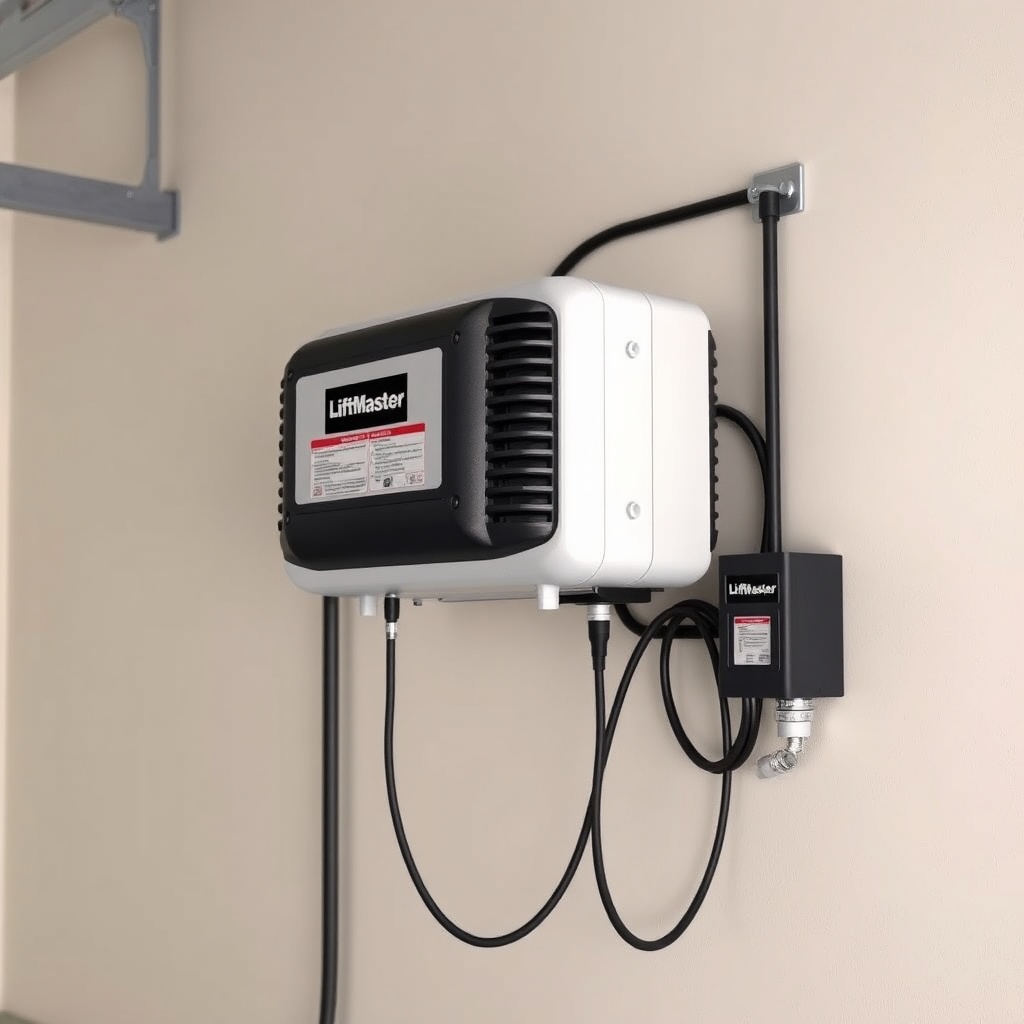
Unplug the opener from the mains and remove the battery cover on the side of the unit. The 8500’s backup slot is near the motor housing; the manual shows exact location.
Step 2: Mount the Battery Bracket
Use the supplied screws to attach the bracket to the wall within 18 inches of the opener. Avoid placing it where it might obstruct door travel or where water could splash (e.g., near a drain). Tighten firmly—the battery weighs about 2.5 kg.
Step 3: Connect the Harness
Route the cable from the battery to the opener’s backup port. The connector is keyed to prevent reverse polarity—align red-to-red and black-to-black. Double-check: reversing polarity can damage the control board.
Step 4: Insert the Battery and Test
Slide the battery into the bracket, plugging in the harness. Replace the opener cover. Plug the unit back into mains. Press the test button on the backup module; a green LED confirms readiness. Disconnect mains briefly to simulate a power cut—the door should cycle normally for up to 10 cycles (per LiftMaster’s spec).
If the opener doesn’t engage, refer to the LiftMaster 8500 Error Code Decoder: Troubleshooting Common Faults for LED blink patterns.
Battery Backup Specifications and Maintenance
| Parameter | Specification |
|---|---|
| Battery type | Sealed lead-acid (AGM), 12V DC |
| Capacity | 5 Ah (approx. 60 Wh) |
| Max door cycles (full charge) | 10–15 cycles (standard 7 ft door) |
| Charging time (from dead) | 24–48 hours |
| Operating temperature range | -20°C to 50°C |
| Battery lifespan | 2–3 years (typical use) |
| Replacement cost (475LM) | £70–£90 GBP |
Regular maintenance: test monthly by disconnecting mains, and clean battery terminals with a dry cloth if corrosion appears. If the backup fails during a power cut, the door can be manually released with the red cord—but you’ll want to replace the battery promptly.
What Owners Say About the LiftMaster 8500 Backup
UK owners on forums like Screwfix and MyBuilder frequently praise the 8500’s backup as a “lifesaver” during winter storms. One reviewer noted: “After a tree brought down our power for six hours, the 8500 let us get the car out without wrestling with a manual release.” Others highlight the quiet operation. However, some report the battery running flat after only 4–5 cycles in cold garages (below 5°C). The consensus: keep the garage insulated and test every two months. For overheating concerns, see the LiftMaster 8500 Opener Motor Overheating: Causes and Troubleshooting Guide—some users link low battery performance to motor strain during heavy use.
Frequently Asked Questions
Q: How long does the LiftMaster 8500 battery backup last on a full charge?
A: Typically 10–15 full cycles for a standard 7 ft door. In very cold garages (below 0°C), expect 5–8 cycles. The unit automatically recharges when mains power returns.
Q: Can I install the battery backup myself, or need a pro?
A: It’s a DIY-friendly job for anyone comfortable with basic tools (screwdriver, drill). The hardest part is routing the cable neatly. Expect 30–60 minutes.
Q: Will the backup work if the garage door spring is broken?
A: No—the backup only powers the motor. A broken spring prevents safe operation, and the system will detect abnormal resistance and stop. LiftMaster 8500 Spring Repair: Torsion vs Extension Guide covers diagnosis and repair.
Q: Does the 8500 backup support all door sizes?
A: Yes, up to a 14 ft wide door (standard residential). For oversized doors (e.g., 16 ft), consider the 8500W model with a larger backup battery option.
Q: My backup LED flashes red—what does that mean?
A: Red flash indicates a low battery or charging fault. Check harness connections and try a full charge (48 hrs). If persistent, the battery needs replacement. See LiftMaster 8500 WiFi Setup Troubleshooting: Fix Connection Issues for LED codes related to the backup.
Q: Can I use a third-party battery instead of the 475LM?
A: Only if it matches specs exactly (12V, 5Ah, AGM, with correct connector). Using off-brand batteries voids the warranty and may cause charging issues. Stick to LiftMaster or authorised replacements.